For most people, a same-day professional camera glass repair is the safer call. It protects the sensor from dust and debris, keeps your warranty intact, and gets you back to full camera function in under an hour. Experienced DIYers can still replace the external glass cover safely with the right tools, but internal module damage belongs to a technician.
TL;DR:
DIY external camera glass replacement can be successful if dust contamination is carefully avoided, but internal damage requires professional diagnostics.
Professional repair offers inspection of the entire module, testing of optical stabilization, and certification, reducing the risk of unseen sensor damage.
Same-day repair services typically take 30 to 45 minutes with a warranty, while DIY parts are cheaper but void water resistance and may cause dust issues.
Signs such as persistent smudges, focus failure, or water damage indicate internal sensor problems that only a technician can properly diagnose and fix.
Reliable shops should perform pre- and post-repair testing, use quality parts, and provide clear warranties; avoid those unwilling to offer diagnostics or guarantees.
Table of Contents
-
DIY External-Glass Replacement vs. Professional Camera Glass Repair
-
What Camera Glass Repair Actually Costs and How Long It Takes
DIY External-Glass Replacement vs. Professional Camera Glass Repair
The camera glass on your phone’s rear housing is a separate piece from the camera module itself. In most cases, that external glass is glued to the back cover and can be swapped without touching the sensor, which is exactly what makes DIY replacement possible for a cracked or scratched lens cover.
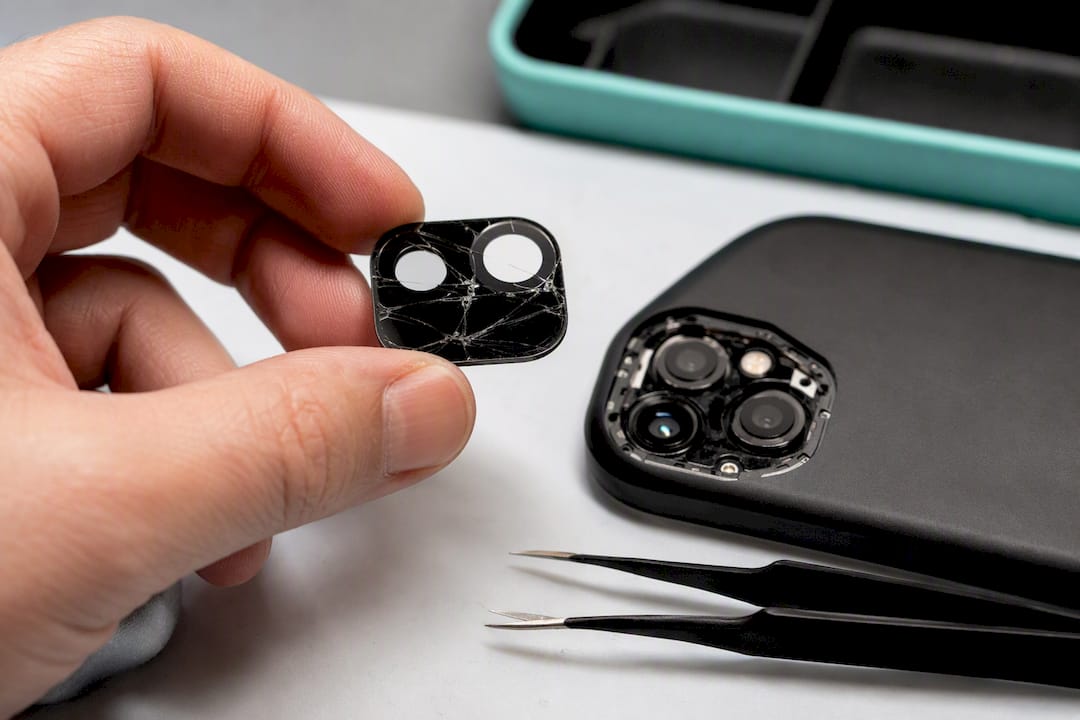
Professional repair covers more ground. A shop can replace the glass, inspect the module, test optical image stabilization (OIS), and diagnose problems a home repair can’t catch, like a hairline sensor crack or corrosion from moisture.
Here’s how the two paths stack up:
-
What gets fixed: DIY handles the external glass cover only; a shop can address the glass, the module, or both.
-
Time to finish: DIY typically runs 30 to 60 minutes if you have the right parts on hand; shop repairs are often comparable but come with diagnostics built in.
-
Cost: DIY parts run cheap; shop labor adds a service fee but includes testing and a warranty.
-
Risk: DIY risks dust contamination or a botched adhesive seal; professional repair carries far less risk to the sensor.
-
Warranty and water resistance: DIY usually voids any factory water-resistance rating; shop repairs vary by provider, but a warranty on the work itself is standard practice at reputable repair services.
How to Replace External Camera Glass Yourself
If you’re going the DIY route, treat this as a precision job, not a quick fix. A cracked lens cover is forgiving to replace. A contaminated sensor is not.
Tools and parts you’ll need:
-
Pre-cut adhesive strip sized to your phone model
-
Replacement camera glass (model and lens-position specific)
-
Heat source (heat gun on low, or a hair dryer)
-
Plastic picks or a spudger
-
Rocket blower for dust removal
-
99% isopropyl alcohol and lint-free swabs
-
Kapton tape or masking tape to shield nearby components
Safety checklist before you start:
-
Work in a clean, low-dust room, ideally with a bright overhead light for inspection.
-
Ground yourself or work on an anti-static mat to avoid static discharge near exposed components.
-
Tape off adjacent lenses and the flash to prevent scratches or alcohol contact.
Step-by-step procedure:
-
Apply gentle, even heat to the cracked glass for 20 to 30 seconds to soften the adhesive underneath.
-
Use a plastic pick to lift one edge, then work around the perimeter slowly. Rushing this step is the most common cause of a cracked bezel.
-
Remove any remaining glass in small pieces rather than forcing the whole cover out at once.
-
Clean the bezel with a swab lightly dampened, not soaked, in isopropyl alcohol. Excess alcohol can seep past the seal and damage the sensor, so less is more here.
-
Use the rocket blower to clear dust from the opening, then inspect under strong light before sealing anything.
-
Apply the new pre-cut adhesive, align the replacement glass carefully, and press it into place.
-
Let the adhesive cure per the manufacturer’s guidance, then power on the device and test every camera mode.
Trapped dust between the glass and sensor is the single most common cause of a failed DIY camera repair, and it’s usually invisible until you take a photo against a bright, plain background.
Pro Tip: Use pre-cut adhesive instead of liquid glue. Pre-cut adhesive strips seal more evenly and eliminate the overflow risk that comes from spreading glue by hand, especially on multi-lens arrays where each lens cover can be a slightly different size.
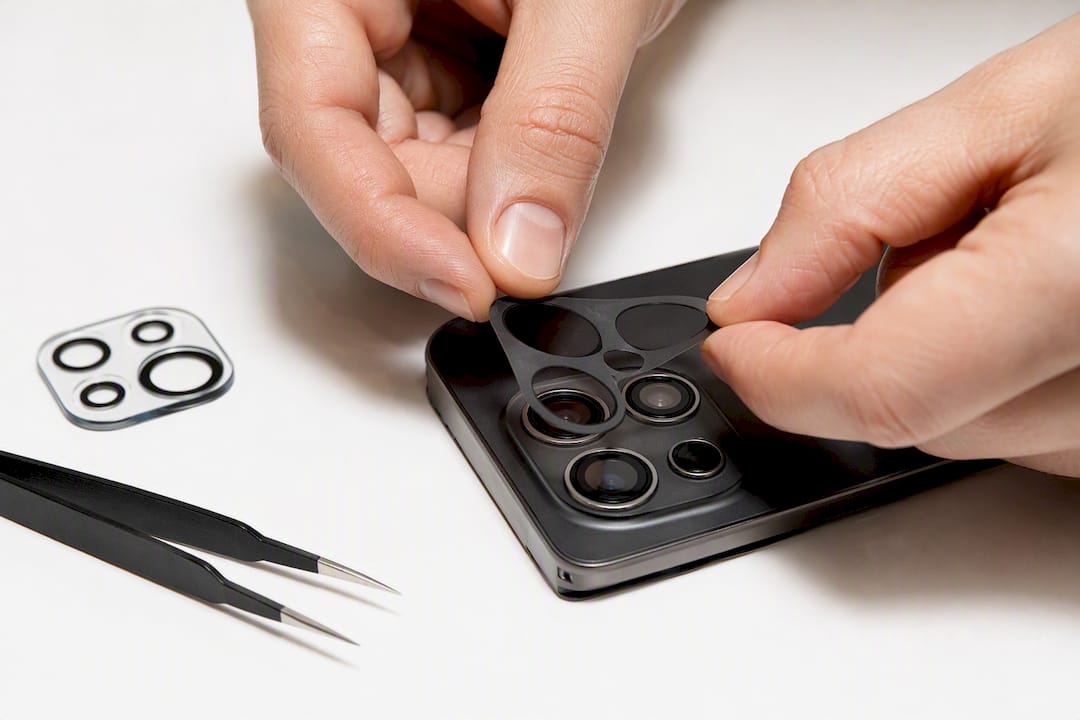
Run a white-wall test and a portrait-mode test before you consider the job done. If the photos come back clean and focus locks properly, the repair worked. If you see dark spots, blur, or focus hunting, stop and consider a professional evaluation.
Signs You Should Skip DIY and See a Professional
Some symptoms point past the glass and into the module or sensor, where a home repair kit won’t help.
-
Dark spots or smudges that stay in every photo, especially near the frame’s edges
-
Photos that won’t focus at all, or focus that hunts back and forth without locking
-
A buzzing, clicking, or grinding sound when the camera opens, which usually points to OIS damage
-
Any exposure to water, especially if the phone was submerged or the camera lagged before failing
-
Multiple failed components at once, like a cracked glass paired with a dead flash or a non-responsive camera app
Water damage in particular raises the stakes. Moisture can corrode the flex cable or short the sensor, and that kind of damage rarely announces itself clearly until weeks later. A failed DIY attempt on internal components often costs more to fix afterward than a proper diagnostic would have cost upfront, because now a technician has to undo amateur work before starting the real repair. Professional diagnostics typically test the camera across every mode, focus, exposure, and zoom, alongside a physical inspection of the module and OIS system, which is the kind of check a home repair simply can’t replicate.
What Camera Glass Repair Actually Costs and How Long It Takes
Replacement glass for common phone models generally runs cheap on the parts side, though quality and fit vary between listings, and premium sapphire-style covers cost more than standard glass. Shop labor adds to that baseline but includes diagnostics and a warranty you don’t get from just buying parts.
-
DIY parts: Budget-friendly, but fit and adhesive quality vary by seller.
-
Shop labor: Many independent repair shops advertise same-day turnaround between 30 and 90 minutes; Mobile Care completes most repairs in 30 to 45 minutes.
-
Mail-in services: Slower, often a week or more, but some offer OEM-grade parts and longer warranty terms in exchange for the wait.
-
Water resistance and warranty: DIY replacement typically voids any factory water-resistance rating, and it certainly ends any manufacturer coverage still in effect.
Same-day service matters most when you rely on your phone for work or can’t be without a working camera for a week. Mail-in makes sense only when the exact OEM part matters more than speed.
How to Judge a Camera Repair Shop Before You Pay
A reputable shop should be transparent about what it tests and what it guarantees, before you hand over your device.
-
Ask whether they run a live camera test before and after the repair, not just a visual check.
-
Confirm the parts are quality-tested and the technician working on your device is certified.
-
Get the repair timeframe and warranty length in writing. A same-day repair with a real warranty, Mobile Care completes many repairs within about an hour and provides a 30-day warranty, is a reasonable benchmark to compare against.
-
Ask what’s included in post-repair testing: focus accuracy, portrait mode, zoom performance, and a white-wall test for dust or smudging.
Pro Tip: Ask to see the camera app open and take a test photo before you leave the shop. A technician confident in the repair won’t hesitate to show you.
Red flags include a shop that won’t quote a warranty length, can’t explain what parts they use, or wants payment before any diagnostic. Those are the moments to walk instead of pay.
The Real Tradeoff Nobody States Plainly
Most guides on this topic treat DIY camera glass repair as either heroic or reckless, with nothing in between. Neither framing helps you. The truth is narrower: replacing the external glass cover is a genuinely reasonable weekend project for someone comfortable with a heat gun and a spudger, and the failure rate has less to do with skill than with patience around dust control.
Where conventional advice falls short is in treating every camera problem as the same problem. A cracked cover and a failing OIS motor look identical to an untrained eye, but one is a 30-minute fix and the other needs a bench and real diagnostic tools. If you can’t tell which one you’re facing, that uncertainty alone is your answer: get it looked at professionally.
What I’d prioritize first isn’t cost or speed. It’s whether you can actually confirm, before you start, that the damage is limited to the glass. If you can’t confirm that, a same-day shop visit costs you an hour and saves you from turning a $20 part into a $200 problem.
— SS
Get Your Camera Glass Fixed the Same Day at Mobile Care
Some repair providers offer a faster, lower-risk alternative to sourcing parts yourself and hoping the adhesive seals clean the first time. Many camera repairs may be completed in 30 to 45 minutes, with certified technicians handling the work, quality-tested parts on every job, and a 30-day warranty backing the repair.
Pricing stays transparent from the first quote, and every repair includes the post-repair testing a shop visit should always include: focus checks, portrait tests, and a full function pass on the camera. If your camera glass is cracked, foggy, or shattered, browse the full range of device repair services Mobile Care offers, or head straight to a location like Cumberland Mall or Perimeter Mall for a same-day diagnostic. Walk in, get the camera assessed, and walk out with a working phone.
Sources
-
iPhone 15 Pro camera lens replacement guide: DIY repair for cracked glass
-
Professional camera and lens repair services — Perfect Image Camera