If a laptop keyboard has one or two dead keys and no liquid ever touched it, a DIY laptop keyboard replacement with a verified OEM part is a safe, low-cost fix. If multiple keys stopped working, liquid got inside, or the keyboard is riveted into the top chassis, professional repair is the safer call. Either way, start by confirming the model number and running a quick hardware check before you spend a dollar on parts.
TL;DR:
- Replacing a single dead key with an OEM part is often low-cost and straightforward, but multiple dead keys or liquid damage typically require professional repair.
- Confirm your laptop model number and connector type accurately before purchasing a replacement to avoid compatibility issues that could lead to larger repairs.
- Keyboards can usually be replaced through a series of steps involving power down, screw removal, ribbon connector unlocking, and careful reassembly, with proper tools and precautions.
- DIY replacement is manageable for minor cosmetic issues but unwise for liquid damage, riveted keyboards, or when unsure about connector details, making professional service advisable.
- Professional repair services offer quick turnaround, tested OEM parts, and warranties, especially for complex or fully integrated keyboards that are difficult to DIY.
Table of Contents
- How Do I Know If My Laptop Keyboard Problem Is Hardware or Software?
- How Do I Find the Right Replacement Keyboard for My Laptop?
- How Do You Replace a Laptop Keyboard Step by Step?
- Should I Replace a Single Key or the Whole Keyboard?
- When Should I Just Hire a Professional for Keyboard Repair?
- What Actually Decides This: My Take
- Fast, Warrantied Keyboard Repair When You’d Rather Not DIY It
- Where to Find Model-Specific Guides and Parts
- Sources
- FAQ
How Do I Know If My Laptop Keyboard Problem Is Hardware or Software?
Before you assume you need a laptop keyboard repair, rule out the cheaper explanation: software. A stuck driver, a bad update, or a language-layout glitch can mimic a dead key.
Start with a restart, then boot into Safe Mode to see if the same keys misbehave outside your normal Windows environment. Plug in an external USB or Bluetooth keyboard next. If typing works fine externally but not on the built-in keys, the fault is almost certainly hardware. PCMag’s troubleshooting workflow recommends this exact sequence, rebooting first, testing externally second, before anyone assumes a hardware failure.
A few more checks worth running:
- Open the on-screen keyboard (Windows key + Ctrl + O, or through Ease of Access settings) and compare it against physical key presses.
- In Device Manager, uninstall the keyboard driver and let Windows reinstall it on restart.
- Note whether the dead keys form a pattern, like an entire row or one side of the board, which often points to a ribbon connector issue rather than a single broken switch.
Pro Tip: If keys work intermittently, especially after the laptop warms up, suspect a loose ribbon connector before you order a whole new keyboard. Reseating it sometimes solves what looks like a hardware failure.
How Do I Find the Right Replacement Keyboard for My Laptop?
Ordering the wrong part is the single most common reason a laptop keys not working problem turns into a bigger repair. Getting the model number right solves most of it.
Check the sticker on the bottom of the laptop, or pull the exact model and service tag from BIOS or the manufacturer’s support site. Dell’s support documentation, for example, ties diagnostics directly to the service tag so you’re matched to the correct part, not a similar-looking one.
Connector type matters as much as the model number. Most laptops use a flat ribbon cable, but some rely on pogo-style spring pins, and a handful of older or niche models use a small USB connector instead. Pin count, backlight wiring, and regional layout (ANSI versus ISO) all have to match, or the new keyboard won’t seat or function correctly.
Before buying:
- Confirm whether you need a single-key kit or a full keyboard assembly.
- Look for listings showing clear photos of the connector and retainer clip, not just the top-side keys.
- Check that the part number is explicitly listed as compatible with your exact model, not just “similar.”
- Verify shipping to your location and the seller’s return policy in case the connector doesn’t match.
For laptop keyboard spare parts, iFixit’s laptop parts catalog and model-specific listings, such as its Lenovo keyboard parts page, pair the part with a repair manual, which cuts down on guesswork. For single keys, Laptop-keys specializes in OEM key kits sold by exact model.
How Do You Replace a Laptop Keyboard Step by Step?
Many laptops follow a similar basic sequence for keyboard replacement, with variations in screw locations. Before starting, gather appropriate tools such as a small screwdriver, plastic pry tool, tweezers, and cleaning supplies. Using an anti-static wrist strap is recommended if you are prone to static discharge. Photograph the device to keep track of screw locations.

Begin by fully powering down your laptop and unplugging all power sources. Remove the battery if it is removable. If the battery is internal, allow the device to discharge or disconnect the battery after opening the case. 2. Remove the retention screws or bezel. Laptop screws vary wildly in length, so keep them grouped by the section they came from. 3. Gently pry the top edge with the spudger and tilt the keyboard upward like the cover of a book, keeping tension off the ribbon. 4. Locate the ribbon connector and unlock it properly, flipping or sliding the small locking clip rather than pulling on the connector body. 5. Disconnect by pulling the ribbon fabric itself, never the connector housing. 6. Seat the new keyboard’s ribbon into the socket, then lock the clip back down. 7. Test every key before final reassembly. Power the laptop on with the keyboard still loose and type across the full board, including function and backlight keys. 8. Replace screws and bezel only after you’ve confirmed every key registers.
Pro Tip: Forcing or yanking a ribbon cable is the leading cause of permanent motherboard damage during keyboard swaps. If a connector feels stuck, stop and recheck the locking clip position instead of pulling harder.
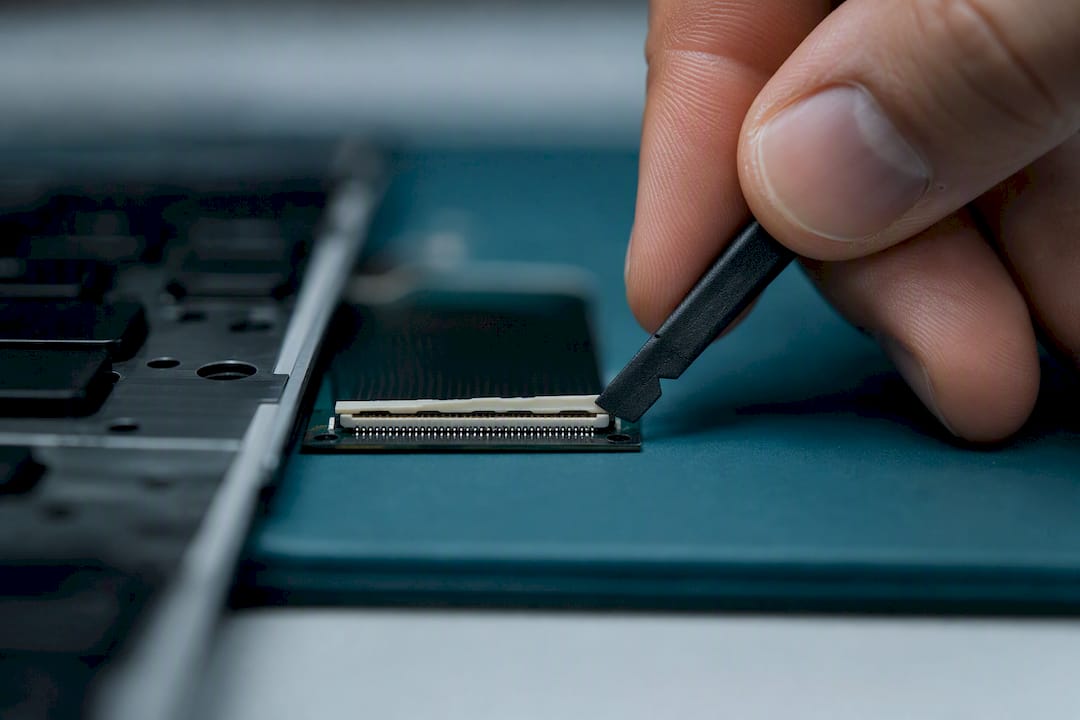
If a key or section still fails after reinstall, the culprit is usually a part mismatch or a ribbon that didn’t fully seat, not a defective new keyboard.
Should I Replace a Single Key or the Whole Keyboard?
A single-key kit makes sense when the damage is cosmetic or mechanical and confined to one or two keys, like a broken retainer clip or a missing cap. These kits are inexpensive, often under $10, and typically include the cap, retainer clip, and rubber cup dome, with installation taking a few minutes once you know the mechanism.
Full keyboard replacement becomes the better option when:
- Several adjacent keys have stopped working, which usually means ribbon or membrane damage rather than isolated switches.
- Liquid got into the keyboard, since residue spreads under the membrane and corrodes contacts over time.
- The keyboard is bolted or riveted into the chassis, a common design on ultrabooks and many MacBook models, where partial repair isn’t really an option.
Price brackets scale accordingly: single-key kits sit at the low end, full OEM keyboard assemblies cost more in parts alone, and professional repairs add labor on top of parts but usually include testing and a warranty. A MacBook keyboard replacement price tends to run higher than a typical Windows laptop because Apple’s keyboards are often fused to the top case, turning what sounds like a keyboard swap into a full chassis replacement.
The real hidden cost isn’t the part. It’s a damaged ribbon connector or a cracked motherboard header from forcing a mismatched piece into place, either of which can turn a $15 fix into a much larger repair bill.
When Should I Just Hire a Professional for Keyboard Repair?
Stop the DIY laptop keyboard replacement and call a shop if you’re dealing with liquid damage, a riveted or fully integrated keyboard, several failed components at once, or if you simply don’t feel confident popping open the chassis. Some laptop keyboards are modular and easy to access; others require professional tools and experience to remove safely, and guessing wrong on which type you have is how screens and trackpads get damaged during a keyboard swap.
A reputable repair shop should offer:
- OEM or quality-tested replacement components, not unverified generic parts.
- Certified technicians who’ve handled your device type before.
- Transparent, upfront pricing before any work begins.
- A chance to test the new keyboard before you pay.
- A written warranty covering the repair.
Pro Tip: Before booking, ask directly: “Do you use OEM or tested parts, what’s the warranty, can you test it before I pay, and how long will it take?” A shop that hesitates on any of those answers is one to skip.
Straightforward keyboard swaps at a staffed repair counter often finish the same day, sometimes in under an hour. More complex or riveted designs can take longer depending on part availability.
What Actually Decides This: My Take
Cosmetic damage or a single dead key with a genuine OEM kit available is a fair weekend project. Liquid damage, or that nagging feeling you’re not sure which screw goes where, is when a professional is worth the money. The teardown itself isn’t hard; the judgment call about your specific model is where people get into trouble.
If you do go DIY, photograph every screw location and bag them by section as you go. That habit alone prevents most of the reassembly headaches that turn a 20-minute job into an afternoon. It also makes handing the project to a technician far easier if you decide partway through that you’re in over your head.
— SS
Fast, Warrantied Keyboard Repair When You’d Rather Not DIY It
A professional repair service exists for the exact moment a DIY laptop keyboard replacement starts to feel riskier than it’s worth, whether that’s liquid damage, a riveted keyboard, or simply not wanting to gamble on a part. Certified technicians can use quality-tested parts, test the keyboard before you pay, and back repairs with a warranty.

Most straightforward keyboard replacements are finished same-day, typically in 30 to 45 minutes, so you’re not without your laptop for days waiting on a shipped part. Book a diagnostic through our repair services page, and if you’re near one of our locations, including Cumberland Mall or Perimeter Mall, stop in and we’ll confirm the part, price, and turnaround before any work starts.
Where to Find Model-Specific Guides and Parts
For model-specific instructions, manufacturer pages like Dell’s keyboard troubleshooting guide walk through diagnostics tied to your exact service tag. iFixit’s laptop device page pairs tested parts with repair manuals, and Laptop-keys.com covers single-key kits specifically. For faster professional service, visit Mobile Care to find your nearest location.
Sources
FAQ
How Much Does It Cost to Replace a Laptop Keyboard?
Single-key kits often run under $10, while a full OEM keyboard assembly costs more in parts alone, and professional repair adds labor and testing on top of that. Professional repair services may provide transparent pricing before work begins, so you know the total cost upfront.
Can You Replace Just the Keyboard on a Laptop?
Yes, on most laptops with modular keyboards you can replace the entire keyboard assembly or just a single key using a compatible kit. Some ultrabooks and MacBook models integrate the keyboard into the top case, which limits repair to a full assembly swap.
Will Any Keyboard Work With My Laptop?
No. The replacement has to match your exact model number, connector type, pin count, and layout, or it won’t seat or function properly. Checking your model against a manufacturer parts page or a site like iFixit before buying prevents this mismatch.
Are Laptop Keyboards Fixable?
Most laptop keyboards are fixable, either through a single-key kit for isolated damage or a full keyboard swap for wider failures. Liquid damage or a riveted keyboard design usually pushes the repair from a DIY task into professional territory.