Run three quick checks first: confirm Bluetooth is off, test the earpiece against the loudspeaker, and restart in Safe Mode to rule out a rogue app. If sound comes back muffled rather than absent, a dry cleaning pass or a cautious sound-ejection method usually clears it. If the audio still crackles, cuts out, or stays silent afterward, stop troubleshooting and get the phone to a technician before moisture or damage spreads further.
TL;DR:
- Most sound issues are caused by debris or software routing problems, which can often be resolved with cleaning or restarting before opening the device.
- A clogged grille is the most common cause of muffled sound and can be fixed with gentle brushing, poster putty, or careful use of compressed air, avoiding pins or liquid cleaners.
- Water trapped inside the speaker can sometimes be freed using pulsed low-frequency tones, but only after removing visible moisture, and persistent issues likely require professional repair.
- Persistent crackling, distortion, or changing sound depending on device position indicate hardware damage, not debris, making professional diagnosis and replacement necessary.
- Quick, same-day professional repair options with quality parts and warranties are recommended if initial troubleshooting and cleaning do not restore sound.
Table of Contents
- Fast Diagnostic Checklist: Is It Software or Hardware?
- How Do You Clean a Muffled or Clogged Phone Speaker?
- Can Sound Waves Really Push Water Out of a Speaker?
- When Should You Stop DIY and Get Professional Speaker Repair?
- What Happens During a Professional Speaker Repair Visit?
- Why Mobile Care Is a Practical Choice for Speaker Repair
- Trust the Cleaning Before You Trust the Tone Generator
- Get Your Speaker Fixed Right, Same Day
- Where to Read More
- Sources
- FAQ
Fast Diagnostic Checklist: Is It Software or Hardware?
Before you touch a brush, a pin, or a sound-ejection app, spend two minutes ruling out the easy stuff. Most “broken speaker” complaints turn out to be settings problems, not hardware failures, and you can confirm which one you’re dealing with without opening the phone.
Start with the basics. Turn off Bluetooth and unplug any wired headphones or accessories. Phones routinely keep routing audio to a paired device you forgot about, which makes a perfectly healthy speaker seem dead.
- Check Do Not Disturb, mute switches, and the media volume slider separately from the ringer volume, since they control different sound channels.
- Place a call to test the earpiece speaker, then play a voice memo or a song to test the louder bottom-firing speaker. Distinguishing the two tells you whether one component or both have failed.
- Restart the phone. A stuck audio process causes more silent-speaker complaints than people expect, and a reboot clears it instantly.
- On Android, boot into Safe Mode, which disables all third-party apps. Verizon’s troubleshooting guide recommends this exact step because it isolates whether a downloaded app is hijacking your audio output. If sound works fine in Safe Mode, an app is the culprit, not the speaker.
- iPhone owners should run through Apple’s official sound troubleshooting steps, which include checking the mute switch, testing with a known-good audio file, and confirming no accessory is still connected in Bluetooth settings.
Verizon’s own data notes that these checks often resolve most reported audio issues quickly. That’s worth knowing before you assume the worst.
Here’s the diagnostic logic that matters most: if audio plays correctly through Bluetooth headphones or in Safe Mode but never through the built-in speaker, the phone’s audio hardware itself is likely fine and something is misrouting the sound. If audio fails everywhere, including Bluetooth, and Safe Mode doesn’t help, you’re looking at a deeper problem, possibly hardware, and the cleaning and water-ejection steps below become relevant. Only after these checks should you move on to physical cleaning, because plenty of phones get pried open or blasted with compressed air for a problem that a restart would have solved.
How Do You Clean a Muffled or Clogged Phone Speaker?
A clogged grille is by far the most common reason phones sound muffled, tinny, or quiet, and it’s also the easiest fix on this list. A repair-guide analysis from Ireland Focus puts the DIY success rate for clearing a clogged grille at around 70 percent, compared to a much lower chance of self-repair once the actual speaker diaphragm is physically damaged. That gap matters: it tells you cleaning is worth trying before you assume you need a replacement part.
Follow these steps in order:
- Power off the phone and remove the case. Working on a live device risks a short if moisture is present, and cases trap lint right against the grille where you’re trying to clean.
- Hold the phone speaker-side down and tap the edge gently. Gravity alone dislodges a surprising amount of pocket lint, sand, and dust before you introduce any tool.
- Use a soft-bristled brush, dry, on the grille only. A clean, unused toothbrush or a dedicated anti-static brush works. Brush in short strokes across the mesh rather than jabbing into it.
- Try poster putty (Blu-Tack) for stubborn debris. Press a small ball of putty against the grille and lift straight up. The tack pulls out fine dust and lint that a brush leaves behind, without pushing anything deeper.
- If you use compressed air, hold the can upright, keep the nozzle at least four to six inches away, and use short half-second bursts. Never tilt the can, since that releases liquid propellant instead of air.
Pro Tip: Skip compressed air entirely on iPhones and other phones with sealed, delicate speaker diaphragms. Apple’s own guidance points people toward a soft dry brush specifically because forced air can push debris past the mesh and onto the diaphragm itself, turning a clog into permanent damage.
What you should never reach for: pins, paperclips, or needles poked into the grille holes. They puncture the thin protective mesh and can tear the diaphragm sitting just behind it. Skip liquid cleaners of any kind, including rubbing alcohol, since moisture is exactly what you’re often trying to remove in the first place. Never use a vacuum cleaner directly on the grille either. The suction can pull the diaphragm outward and detach it from its housing, which is a far more expensive problem than the lint you started with. And never apply heat, a hair dryer, a heating pad, direct sunlight on a dashboard, because heat can warp the plastic housing and degrade the speaker’s internal adhesive.
If you’ve cleaned the grille thoroughly and sound is still muffled or absent, you’re likely past a simple debris problem. That’s the point where a physically damaged speaker component becomes the more probable explanation, and no amount of brushing fixes a torn diaphragm or a disconnected internal ribbon.
Can Sound Waves Really Push Water Out of a Speaker?
Yes, within limits, and only after you’ve removed the moisture you can actually see and reach. Pulsed low-frequency tones vibrate the speaker diaphragm enough to physically shake trapped water droplets loose from the mesh and cavity, a method that HowToGeek’s testing and explainer documents in detail. It’s a legitimate technique. It’s also frequently misused, which is where phones get damaged.
Do the prep work first. Wipe every visible surface with a microfiber cloth, remove the case, and hold the phone with the speaker grille facing straight down. This matters more than people assume: gravity is doing half the work here, and the pulsing tone just needs to loosen what gravity can then pull free.
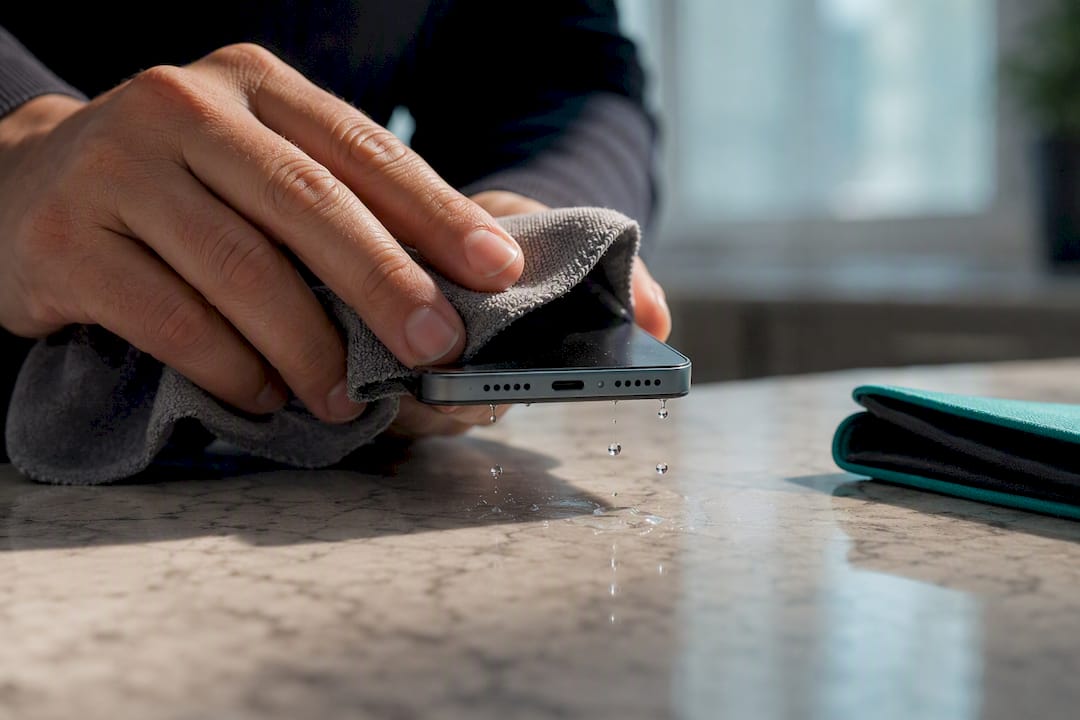
For the ejection itself, use a web-based tone generator or a dedicated water-ejection app rather than guessing with a random ringtone. These tools typically cycle through a low-frequency range in short pulses rather than one continuous blast, which is the detail that actually matters. A steady, sustained tone at high volume risks stressing the voice coil with repeated heat buildup, while pulsing with brief pauses between bursts lets the component cool and reduces that risk. There’s no single “magic number” frequency that works on every phone model, so don’t chase an exact figure. Focus instead on the pattern: pulse, pause, repeat, grille facing down.
A few non-negotiables while you do this:
- Never point a hair dryer, heat gun, or any warm airflow at the speaker to “help” the process. Heat doesn’t evaporate trapped water fast enough to matter and instead risks warping seals and damaging adhesive.
- Never follow up with a compressed-air blast aimed directly into the grille. That combination, sound pulses plus forced air, can drive water deeper into the chassis instead of out of it.
- Don’t run ejection cycles back to back for an hour hoping for better results. Give the phone a few minutes of rest between attempts, and stop after three or four tries if nothing has changed.
- Skip the rice trick entirely. It’s a persistent myth. HowToGeek notes that rice does little for water already sitting inside a sealed speaker cavity, and silica gel packets plus simple time do more.
You’ll know it worked when audio sounds clear and full again rather than crackly or muffled, usually within a few attempts. If sound is still distorted after several rounds, let the phone sit somewhere dry for a few hours, speaker-down, before trying once more. If it’s still off after that, you’re no longer dealing with surface moisture. That’s a sign water reached a connector or corroded a contact, and it calls for a professional diagnostic rather than another round of tones.
When Should You Stop DIY and Get Professional Speaker Repair?
Certain symptoms are reliable signals that you’re past the point where cleaning or sound ejection will help. Persistent crackling or distortion that doesn’t clear up after a reboot and a cleaning pass points to physical damage rather than debris. So does sound that cuts in and out depending on how you’re holding the phone, which usually means a loose internal connector or a partially detached speaker component. If you’ve run through the diagnostic checks, cleaned the grille, and tried sound ejection with zero change, you’re dealing with hardware, not a fixable clog.
Cost is the other half of this decision, and it’s worth being honest about the math. Phone speaker repair cost typically falls into a predictable range once a shop diagnoses the actual failure, though the exact figure depends on your phone model and whether the issue is the speaker module itself or a related connector. Ireland Focus’s repair-cost breakdown frames typical smartphone speaker repairs as a modest fraction of what a full screen or battery replacement runs, which makes sense given the part itself is small and the labor is usually quick.
A simple rule of thumb: if the quoted repair cost sits well under what a comparable used version of your phone would sell for, repair almost always makes more financial sense than replacement. If the phone is already several years old and a quote comes back unexpectedly high, factor in what a next repair might cost too before committing.
- Persistent distortion or crackling after cleaning usually means a damaged diaphragm or torn speaker cone.
- Sound that changes when you tilt or move the phone points to a loose ribbon cable or connector.
- No sound at all despite passing every diagnostic check often means the speaker component has failed completely.
- Any water exposure followed by delayed symptoms deserves urgency. Corrosion spreads on internal contacts over days, not months, and waiting turns a simple speaker replacement into a multi-component repair.
Don’t sit on a water-damaged phone hoping it resolves itself. Corrosion is progressive, and a contact that looks fine today can fail completely within a week if moisture reached it. That’s the scenario where getting a same-day diagnostic beats waiting to see what happens.
What Happens During a Professional Speaker Repair Visit?
A shop visit starts with diagnostics, not a part swap. Expect a visual inspection of the grille and port, a series of test tones played through the speaker to isolate whether the fault is the component or the board it connects to, and a check of related hardware like the charging port and microphone, since water damage rarely stays confined to one part.
Most confirmed hardware failures get resolved with a speaker module replacement, which involves opening the phone’s housing, disconnecting the damaged component, and installing a new one, the same fundamental process iFixit’s teardown guides document for models like the iPhone 16. In water-damage cases, a technician may also need to reseat a loose connector or clean corrosion from contact points before testing whether sound returns to normal.
Before you commit to any shop, ask a few direct questions:
- Are the replacement parts new or quality-tested, and where do they source them?
- What’s the warranty length on parts and labor after the repair?
- What’s the realistic turnaround time, same day, next day, or longer for a mail-in service?
- Is the technician certified, and can they explain what specifically failed before they start work?
Before you drop the phone off, back up your photos and files, sign out of accounts tied to Find My or similar device-locator features, and remove a case or screen protector if the shop will need clear access to the ports. A five-minute backup now saves a much worse conversation later if something unexpected happens during the repair.
Why Mobile Care Is a Practical Choice for Speaker Repair
If your phone speaker needs professional attention, the choice of shop matters almost as much as the repair itself. Mobile Care’s speaker and mic repair service is built around same-day turnaround, with most repairs completed in 30 to 45 minutes rather than the multi-day wait some mail-in services require. That speed matters most if you rely on your phone for calls throughout the day and can’t afford to be without it.
Every repair uses quality-tested parts and comes from certified technicians, backed by a 30-day warranty that covers the work performed. That combination gives you a safety net most independent kiosks don’t offer: if the speaker acts up again shortly after the repair, you’re covered rather than paying twice.
This kind of in-person shop makes sense for a specific set of readers: anyone who’s already run through the diagnostic checks and cleaning steps above without success, anyone who wants a technician to physically inspect the phone rather than guess from a phone call, and anyone who values a warranty over the lowest possible price. If you’re comparing shops, ask the same questions listed earlier, parts sourcing, warranty length, turnaround time, before you hand over your phone. A shop that answers clearly and confidently is usually one worth trusting.
Trust the Cleaning Before You Trust the Tone Generator
The biggest mistake I see in phone speaker troubleshooting isn’t skipping DIY, it’s skipping straight to the flashy fix. Sound-ejection apps get all the attention because they feel clever and modern, but they’re not the first thing you should try. A dry brush and thirty seconds of gravity solve more speaker problems than any tone generator, because clogged grilles outnumber water damage by a wide margin in everyday cases.
Where I’d push back on common advice: people treat sound ejection as low-risk because it’s non-invasive, but running continuous high-volume tones repeatedly puts real thermal stress on a voice coil that wasn’t designed for that kind of workload. Pulsed tones with cooling pauses are safer, and gravity-assisted positioning does more of the actual work than the frequency itself.
The other thing worth saying plainly: if you’ve done the checks, cleaned the grille, tried ejection responsibly, and sound is still wrong, stop. That’s not a DIY failure. That’s a hardware failure, and no amount of persistence with a brush or an app changes that. Getting a quick professional diagnostic at that point isn’t giving up, it’s the correct next move.
— SS
Get Your Speaker Fixed Right, Same Day
When cleaning and sound ejection don’t bring your speaker back, Mobile Care’s speaker and mic repair service gets most phones sorted in 30 to 45 minutes, the same day you walk in, with certified technicians and a 30-day warranty backing the work. That’s a meaningfully faster path than mailing your phone off and waiting a week to find out if the fix held.
Before you head in, back up your photos and sign out of any device-locator accounts so the technician has clear access to run diagnostics. Check hours and drop in at a location near you, including Perimeter Mall, Southlake Mall, or Carolina Place Mall, or start with the full services page to see what a speaker diagnostic involves before you commit.
Where to Read More
For device-specific steps beyond what’s covered here, check Apple’s official sound troubleshooting page, Verizon’s audio troubleshooter for Android quick checks, iFixit’s speaker replacement guides for a look at what a professional repair involves, and Device Giant’s screen troubleshooting guide for a related look at safe initial diagnostic habits.
Sources
- Poor phone audio, speaker not working, no ringing or notification sounds | Verizon Troubleshooter
- Your phone’s speaker is probably clogged with water right now—this video will fix it | HowToGeek
- How to Fix Phone Speaker: Troubleshooting Guide (2025) - Ireland Focus
- iPhone 16 Loudspeaker Replacement - iFixit Repair Guide
FAQ
Can Phone Speakers Be Repaired?
Yes, most phone speaker problems are repairable, whether the cause is a clogged grille, trapped water, or a damaged diaphragm. Clogged grilles respond well to dry cleaning, with DIY success rates around 70 percent according to repair-guide data, while a fully damaged speaker component typically needs professional module replacement.
How Much Does It Cost to Fix a Phone Speaker?
Speaker repair costs vary by phone model and the specific part needed, but they typically run lower than a screen or battery replacement since the component itself is small. Mobile Care’s speaker and mic repair service doesn’t list a fixed price online, so current pricing is available directly through the site or at your nearest location.
Is It Worth Repairing a Speaker Instead of Replacing the Phone?
In most cases, yes. If the repair quote is well below what a comparable used version of your phone would sell for, fixing the speaker is the more cost-effective choice, especially with fast, same-day options available.
How Do You Fix a Mobile Phone Speaker Yourself?
Start with the basics: check Bluetooth and volume settings, restart the phone, and test in Safe Mode on Android to rule out software issues. If the sound is muffled rather than absent, clean the grille with a dry soft brush or poster putty, and for water exposure, try pulsed sound-ejection tones with the speaker facing down after wiping away visible moisture.
What Should You Do if DIY Speaker Fixes Don’t Work?
Stop troubleshooting once you notice persistent distortion, crackling, or sound that changes when you move the phone, since these point to hardware damage rather than a clog. At that stage, a professional diagnostic at a shop like Mobile Care, which offers certified technicians and a 30-day warranty, is the faster and safer path than continued DIY attempts.